Deploy a Flask app on Windows Server using FastCGI and IIS.
If like me you are a Python developer and facing problems while trying to deploy your Flask app on a windows server using IIS. Here is a step-by-step guide for you based on my recent arduous experience.
To help demonstrate how we can deploy our app, I will be using a simple demo ‘Hello World’ Flask app in file main.py in myProject.
from flask import Flaskapp = Flask(__name__)@app.route('/')
def hello():
    return "Hello World! we deployed our Flask app on IIS hurray!!!"
Let's Begin.
1. Setup Python virtual environment:
Let's start with python. Go to your server and download python from here. Once done move to your project directory and create a virtual environment. First, search for the command prompt and run it as administrator.
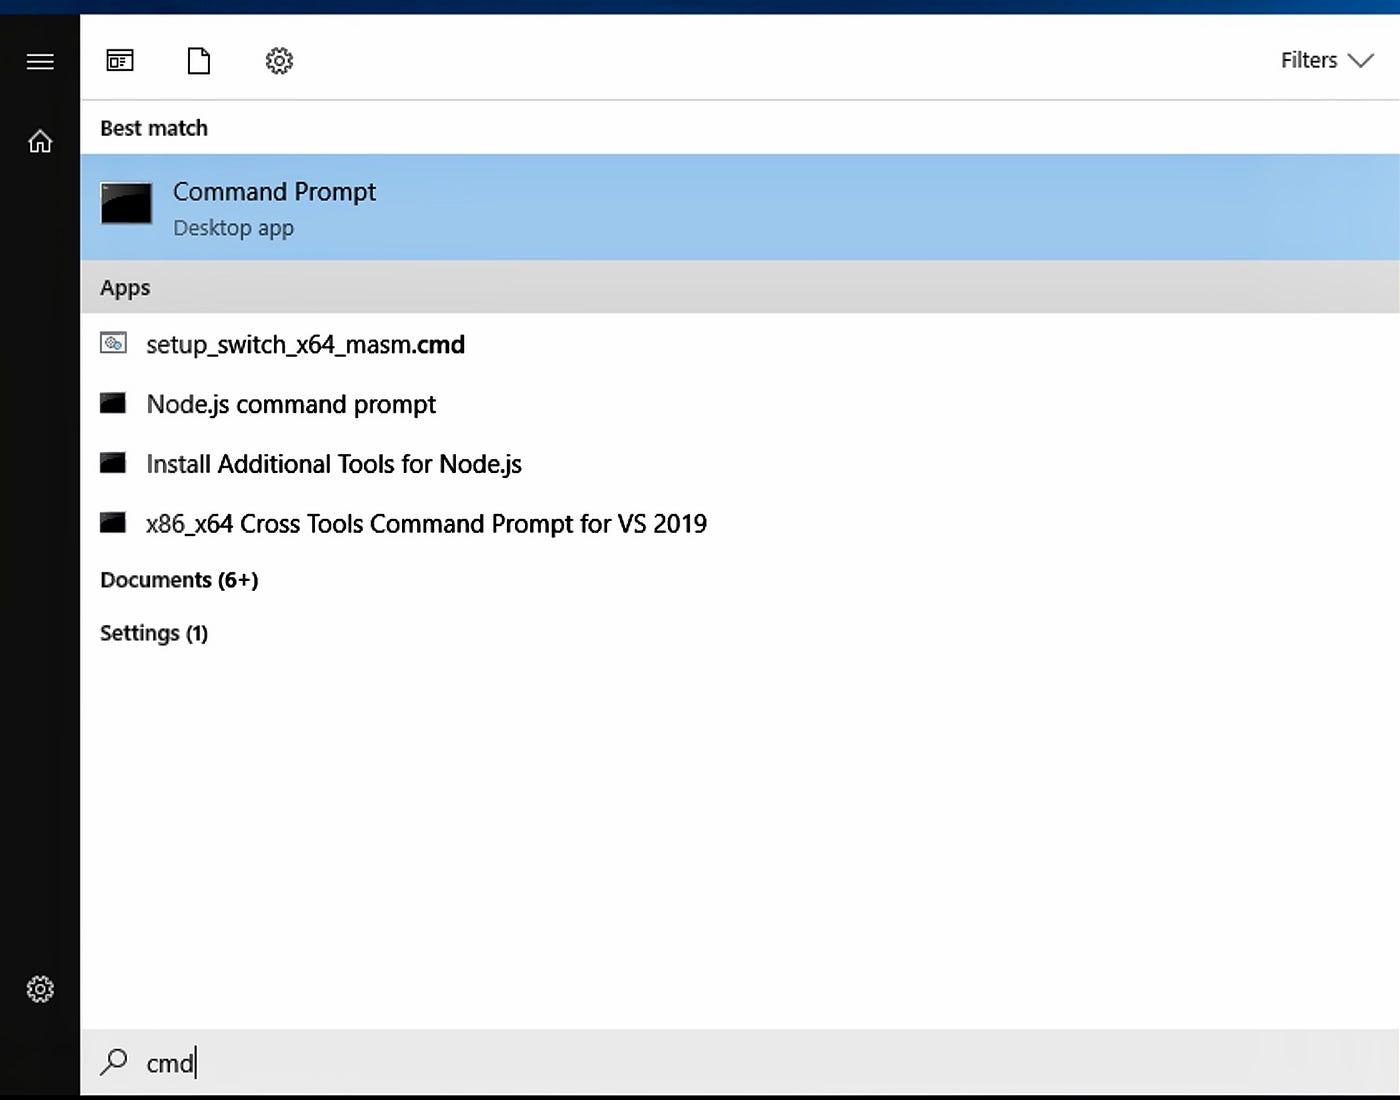
then move to your projects directory by using the command
cd c:/path/to/your/project/directoryyou can copy your path here.

Now you can create a virtual environment by using virtualenv library or by using the following command in the same cmd prompt and then activate it.
python -m venv envenv\Scripts\activate

Once activated you can install all your required python packages in it from requirements.txt or by directly using pip install commands one by one. After the app is ready try running it once, just to check everything works. Then move to step 2.
2. Setup wfastcgi and web.config:
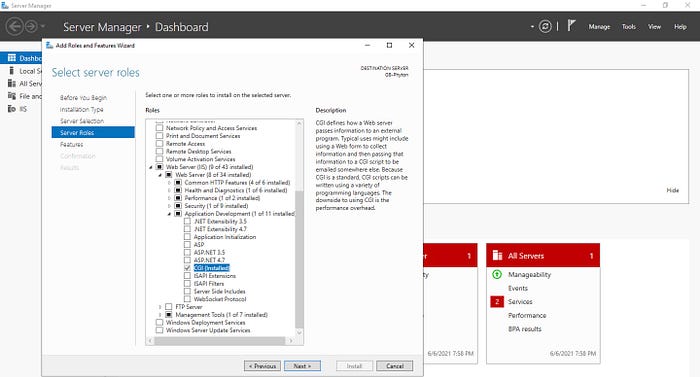
Now that our app is ready to deploy, next we need to set up wfastcgi. Start with installing and activating CGI in your server. you can do this by opening your Server Manager. Click on add role and features

Keep clicking next to reach Server Roles then select
Web Server (IIS)>Web Server>Application Developement>CGI
then click next to install it.
Now go back to your command prompt and install wfastcgi using this command
pip install wfastcgithen run the following command to enable it in the current environment.
wfastcgi-enablethe output should be something like this
Applied configuration changes to section "system.webServer/fastCgi" for "MACHINE/WEBROOT/APPHOST" at configuration commit path "MACHINE/WEBROOT/APPHOST"
"c:\users\tauseeq\desktop\demoflask\env\scripts\python.exe|c:\users\tauseeq\desktop\demoflask\env\lib\site-packages\wfastcgi.py" can now be used as a FastCGI script processor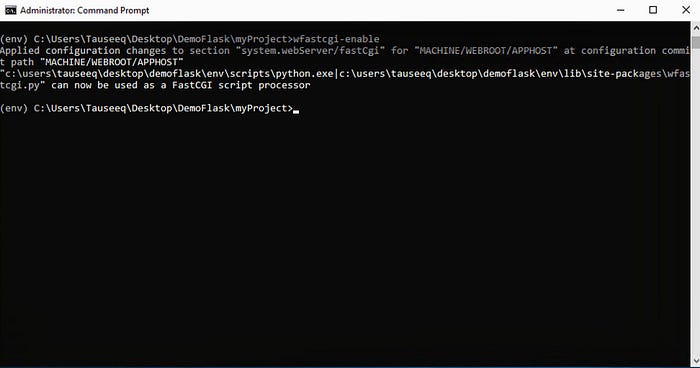
Copy the path text inside quotations.
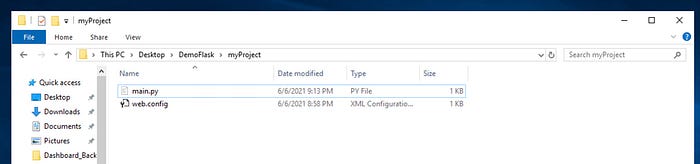
Next up create a file web.config next to your main flask app in my case main.py and add this code in it.
<?xml version="1.0" encoding="utf-8"?>
     <configuration>
     <system.webServer>
       <handlers>
        <add name="Python FastCGI"
           path="*"
           verb="*"
           modules="FastCgiModule"
           scriptProcessor="c:\users\tauseeq\desktop\demoflask\env\scripts\python.exe|c:\users\tauseeq\desktop\demoflask\env\lib\site-packages\wfastcgi.py"

           resourceType="Unspecified"
           requireAccess="Script" />
       </handlers>
     </system.webServer>
     <appSettings>
       <!-- Required settings -->
       <add key="WSGI_HANDLER" value="main.app" />
       <add key="PYTHONPATH" value="C:\Users\Tauseeq\Desktop\DemoFlask\myProject" />
     </appSettings>
     </configuration>
There are three important things in this code that you need to replace.
First scriptProcessor in Python FastCGI tag. This will be the quoted path we copied after we ran command wfastcgi-enable in the previous step.
The second is the value for PYTHONPATH tag. Here you need to copy the path to your flask app where you created your web.config file.
Lastly, we need to give the Flask app’s file name to WSGI_HANDLER tag in my case which is main.py so I will add main.app.
Here I would like to add one extra note in WSGI_HANDLER we need to add the path to our flask app from the path we added in PYTHONPATH tag. So for instance, if I had my web.config file in DemoFlask directory my PYTHONPATH will be C:\Users\Tauseeq\Desktop\DemoFlask and my WSGI_HANDLER will be myProject.main.app. This is important in case you create your app and other objects in the __init__.py file and use them in your views or other places in the project. If you don't use the right path and handler you might get AttributeErrors.
Once we created web.config file correctly we are ready to move to IIS.
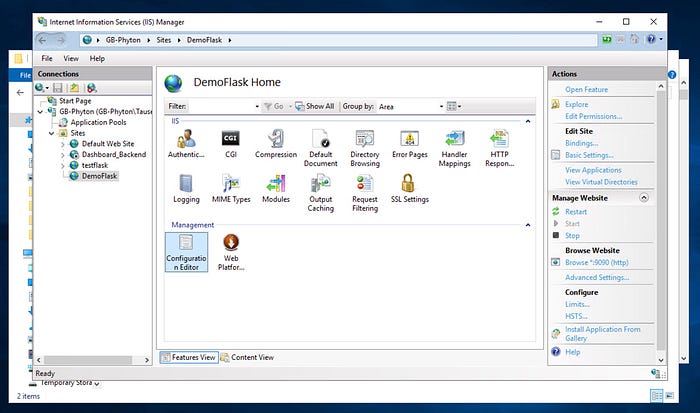
3. Setup Website on IIS:
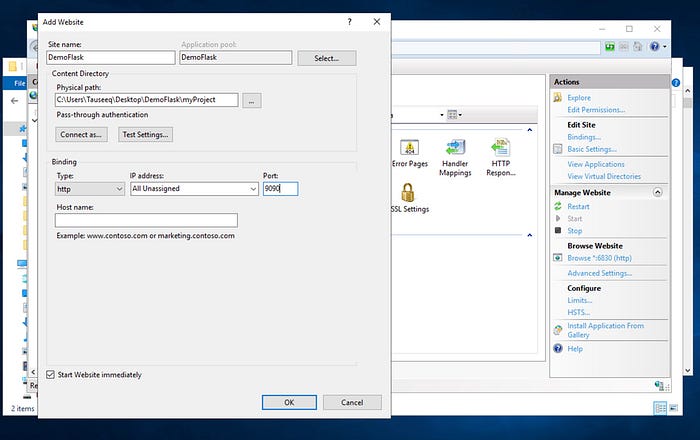
Open your IIS application and go-to Sites. Right-click and click on Add new website.

Here give a name to your website setup and give the physical path to your project directory where we placed web.config. Assign a port number and click ok.
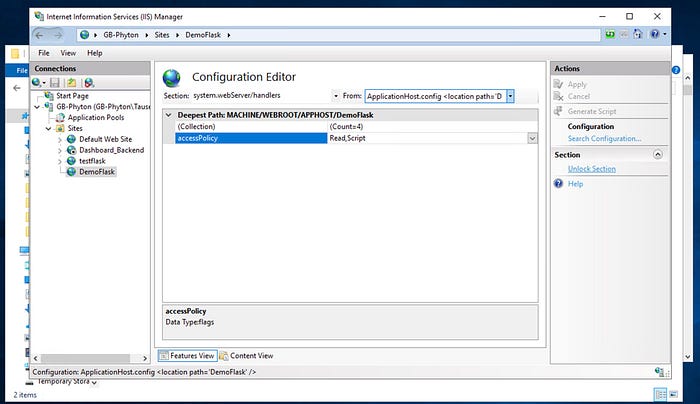
On the left panel drop down the Sites list and click on your website. Inside go to Configuration Editor.
In configuration editor, under Sections dropdown select handlers, and in From dropdown select the second option. Then on the right panel under Section click on Unlock Section. And we are done with IIS.
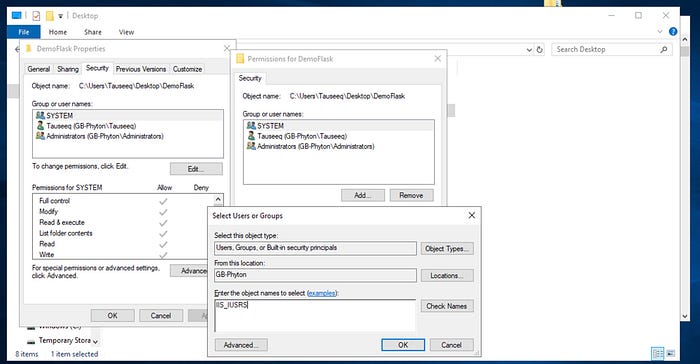
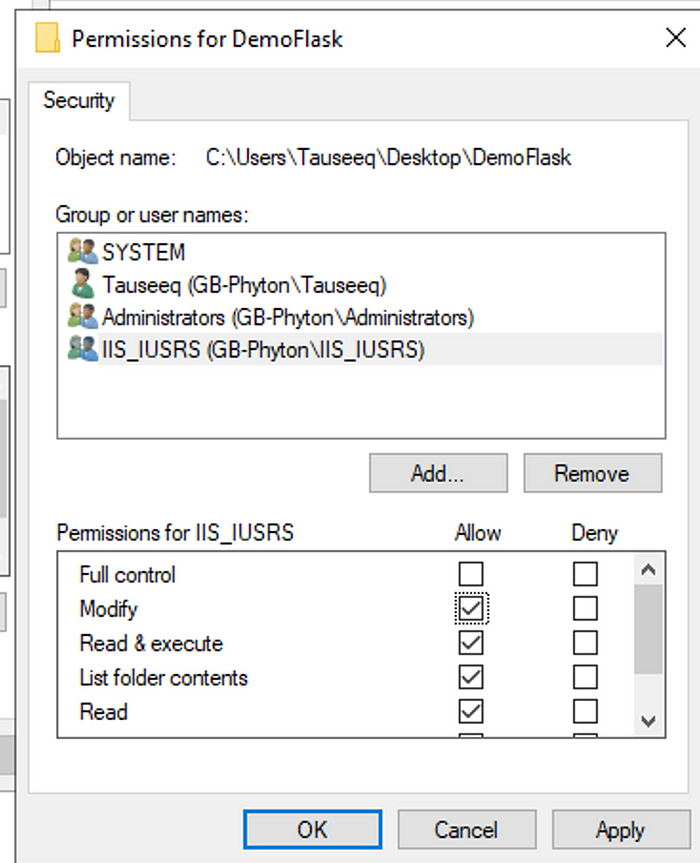
Next, we need to give permissions to IIS_IUSRS. For this part, we need to give IIS Write and Read permissions to every folder involved in this project and yes you read that right about every folder including your virtual environment. Since I have my virtual environment and project in a single folder I will add permission to that folder. To do this we will right-click our folder. go to Properties and into the Security tab.
Click on Edit then click on Add. In the object name field write IIS_IUSRS. click ok. Check Allow for Modify and click apply and ok and ok.
Go back to the IIS application, your website name, and click restart.
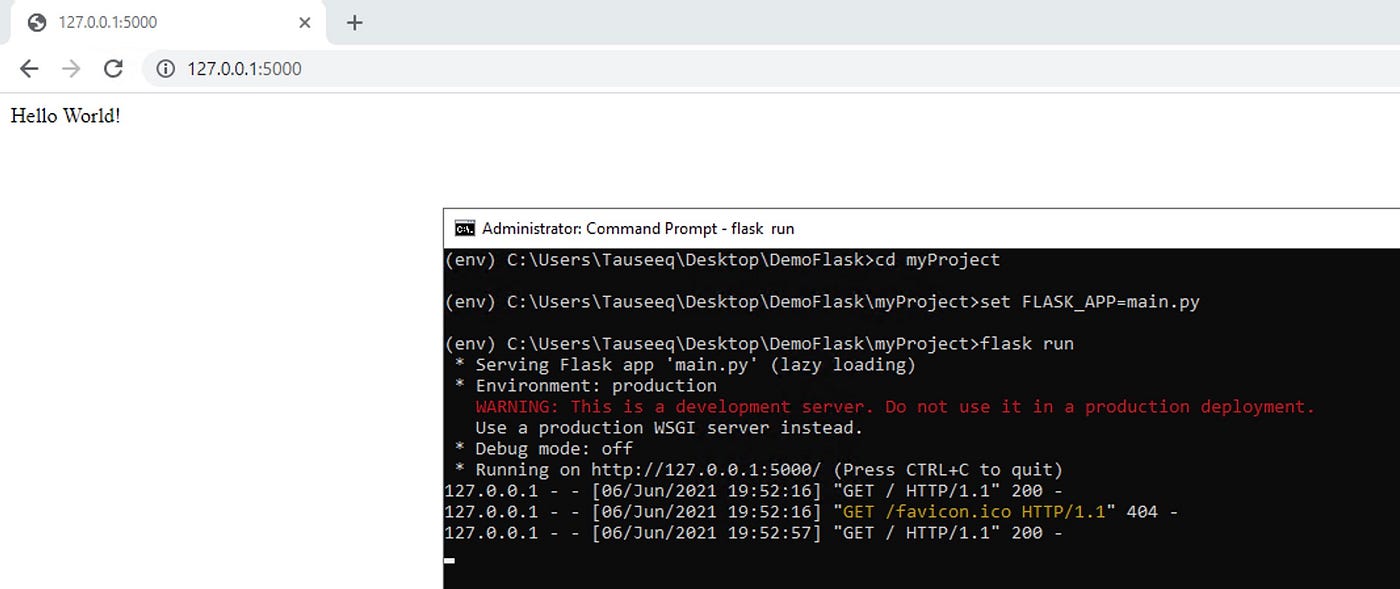
And we are Done our website is ready. Go to the URL and check.

Of course, you need to open the port on your server to access this website outside the server. I hope this helped you and saved you some time.
Happy Coding..!